
In this article, you will learn how to Use Navigation Controller in Xamarin iOS, using Xamarin Studio.


Introduction
Xamarin is a platform to develop cross-platform and multi-platform apps (for example, Windows phone, Android, iOS). In Xamarin platform, the code sharing concept is used. In Xamarin Studio, Visual Studio is also available.
Prerequisites
- Xamarin Studio.
- Xcode.
The steps given below are required to be followed in order to Use Navigation Controller, using Xamarin Studio.
Step 1
Go To Xamarin Studio.
Click New Solution—> select iOS—>select App--> Choose single View App. Afterwards, click Next.

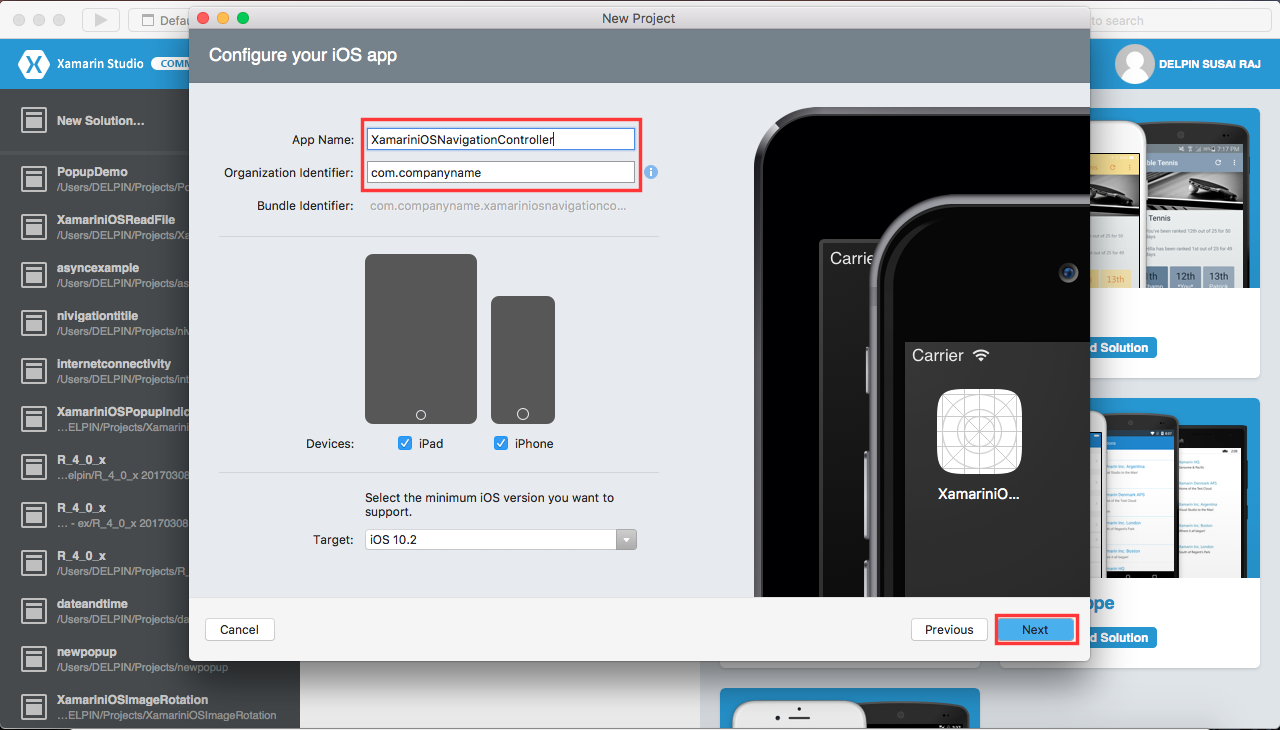
Step 2
In this step, configure your app. Give the app name (Ex:sample), Organization Identifier. Afterwards, click Next.
Step 3
In this step, give your project name (Ex: Sample) and solution name (Ex: Sample). Give the path of your project. Afterwards, click Create.

Step 4
Subsequently, go to the solution. In the solution, get all the files and sources in your project. Now, select Main.storyboard and double click to open Main.storyboard page.

Step 5
After opening the Main.storyboard, you can design this page, as per your desire.

Step 6
Now, go to the toolbox Window. In the toolbox Window, get all the types of the tools and controls. You need to go to the toolbox Window. Now, scroll down and you will see all the tools and controls. You need to drag and drop the Navigation Controller.

Step 7
Now, you can Delete the Table View Controller.

Step 8
In this step, you can set the arrow mark in Navigation Controller front.default set the arrow mark in View Controller. you can move it.

Step 9
In this step, set the Root of your view controller. you can click the bottom of navigation controller (Ctrl+Right Click+ Drag) Move the cursor to View Controller. if release the click show the list of options. you can choose Root.

Step 10
Now,You need to drag and drop the View Controller.

Step 11
Now,You need to drag and drop the Button in your first View Controller.

Step 12
In this step, Navigate to second view controller. you can click the Button (Ctrl +Right Click+ Move) Move the cursor to Second View Controller. if release the click show the list of options. you can choose Push.

Step 13

Output
After a few seconds, the app will start running on your iPhone simulator.You will see your app working successfully.

You can click the Next View Button, Navigation will be work successfully.

Summary
This was the process of how to Use Navigation Controller in Xamarin ios , using Xamarin Studio.

https://xamarinmonkeys.blogspot.com/2018/06/how-to-rotate-image-in-xamarin-ios.html?showComment=1604473678204#c6070427770676257719
ReplyDeleteThanks for sharing this informative content , Great work
ReplyDeleteTo crack Agile coach interview : Scrum master interview questions