Showing posts with label CRUD. Show all posts
Delpin Susai Raj Thursday, 7 February 2019

Xamarin.Forms - Working with LiteDB CRUD Operations

In this blog post , you will learn how to use LiteDB Database with CRUD Operations in Xamarin.Forms.


Introduction


Xamarin.Forms code runs on multiple platforms - each of which has its own filesystem. This means that reading and writing files is most easily done using the native file APIs on each platform. Alternatively, embedded resources are a simpler solution to distribute data files with an app.

LiteDB


  1. LiteDB is serverless database. fully written in C# code.
  2. LiteDB stores documents in the BSON (Binary JSON) data format like MongoDB.
  3. LiteDB is a simple and fast NoSQL database. use to build Mobile, Desktop and small web applications. 


Prerequisites


  • Visual Studio 2017 or Later(Windows or Mac)


Setting up a Xamarin.Forms Project

Start by creating a new Xamarin.Forms project. You’ll learn more by going through the steps yourself.or download source here

https://github.com/susairajs/XamarinForms-LiteDB

Visual Studio 2019 has more options in the opening window. Clone or check out the code from any repository or, open a project or solution for your computer.

Now, you need to click "Create a new project".


Now, filter by Project Type: Mobile
Choose the Mobile App (Xamarin. forms) project under C# and Mobile.

Name your app. You probably want your project and solution to use the same name as your app. Put it on your preferred location for projects and click "Create".

Now, select the blank app and target platforms - Android, iOS and Windows (UWP).
Subsequently, go to the solution. In there, you get all the files and sources of your project (.NET Standard). Now, select XAML page and double-click to open the MainPage.Xaml page.

You now have a basic Xamarin.Forms app. Click the Play button to try it out.


Setting up the User Interface

Go to MainPage.Xaml and write the following code.

MainPage.xaml


Click the Play button to try it out.


NuGet Packages

Now, add the following NuGet Packages.


  • LiteDB


Add LiteDB NuGet

Go to Solution Explorer and select your solution. Right-click and select "Manage NuGet Packages for Solution". Search "LiteDB" and add Package. Remember to install it for .NET Standard project.


Create a Model

In this step, you can create a model to Create a Table.

Person.cs


Get Local File Path

Now, Write the following code to get local file path for storing the database in App.xaml.cs

App.xaml.cs


Create a Table 

In this step, Write the following code to create a LiteCollection and create the table in LiteDBHelper.cs constructor.

LiteDBHelper.cs


Check Database 

if you need to explore your LiteDB database download LiteDBViewer 

https://github.com/falahati/LiteDBViewer/releases

Example 


Read All

Now, write the code to read all data from LiteDB Database.

LiteDBHelper.cs


MainPage.Xaml.cs


Click the Play button to try it out.


Insert

Now, write the following code to insert data into LiteDB Database.


Click the Play button to try it out.


Read

Now, write the following code to read data from LiteDB Database.


Click the Play button to try it out.


Update

Now, write the following code to update data to LiteDB Database.


Click the Play button to try it out.


Delete

Now, write the following code to delete data from LiteDB Database.


Click the Play button to try it out.


Full code

LiteDBHelper.cs


MainPage.Xaml.cs


I hope you have understood, how to use LiteDB Database with CRUD Operations in Xamarin.Forms. Thanks for reading. Please share your comments and feedback.

Happy Coding :)
Delpin Susai Raj Wednesday, 6 February 2019

Xamarin.Forms - SQLite Database CRUD Operations

In this blog post, you will learn how to use SQLite Database with CRUD Operations in Xamarin.Forms.


Introduction


Xamarin.Forms code runs on multiple platforms - each of which has its own filesystem. This means that reading and writing files is most easily done using the native file APIs on each platform. Alternatively, embedded resources are a simpler solution to distribute data files with an app.

SQLite


  1. SQLite is a Light weight database that implements a small, fast, self-contained, high-reliability, full-featured, SQL database engine. 
  2. SQLite is the most used database in the world. It is built into all mobile phones.


Prerequisites


  • Visual Studio 2017 or Later(Windows or Mac)


Setting up a Xamarin.Forms Project

Start by creating a new Xamarin.Forms project. You’ll learn more by going through the steps yourself.or download source here

https://github.com/susairajs/XamarinForms-SQLite

Visual Studio 2019 has more options in the opening window. Clone or check out the code from any repository or, open a project or solution for your computer.

Now, you need to click "Create a new project".


Now, filter by Project Type: Mobile
Choose the Mobile App (Xamarin. forms) project under C# and Mobile.

Name your app. You probably want your project and solution to use the same name as your app. Put it on your preferred location for projects and click "Create".

Now, select the blank app and target platforms - Android, iOS and Windows (UWP).
Subsequently, go to the solution. In there, you get all the files and sources of your project (.NET Standard). Now, select XAML page and double-click to open the MainPage.Xaml page.

You now have a basic Xamarin.Forms app. Click the Play button to try it out.


Setting up the User Interface

Go to MainPage.Xaml and write the following code.

MainPage.xaml


Click the Play button to try it out.


NuGet Packages

Now, add the following NuGet Packages.


  • sqlite-net-pc


Add sqlite-net-pc NuGet

Go to Solution Explorer and select your solution. Right-click and select "Manage NuGet Packages for Solution". Search "sqlite-net-pc" and add Package. Remember to install it for each project (.NET Standard, Android, iO, and UWP).


Create a Model

In this step, you can create a model for create a table.

Person.cs


Get Local File Path

Now, Write the following code to get local file path for storing the database in App.xaml.cs

App.xaml.cs


Create a Table 

In this step, Write the following code to create a SQLite Connection and create the table in SQLiteHelper.cs constructor.

SQLiteHelper.cs


Read All

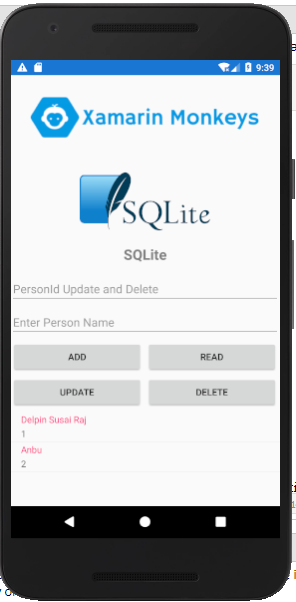
Now, write the code to read all data from SQLite Database.

SQLiteHelper.cs


MainPage.Xaml.cs


Click the Play button to try it out.


Insert

Now, write the following code to insert data into SQLite Database.


Click the Play button to try it out.


Read

Now, write the following code to read data from SQLite Database.


Click the Play button to try it out.


Update

Now, write the following code to update data to SQLite Database.


Click the Play button to try it out.


Delete

Now, write the following code to delete data from SQLite Database.


Click the Play button to try it out.


Full code

SQLiteHelper.cs


MainPage.Xaml.cs


I hope you have understood, how to use SQLite Database with CRUD Operations in Xamarin.Forms. Thanks for reading. Please share your comments and feedback.

Happy Coding :)
Delpin Susai Raj Wednesday, 23 January 2019

Xamarin.Forms - Working with Firebase Realtime Database CRUD Operations

In this blog post, you will learn how to use Firebase Realtime Database with CRUD Operations in Xamarin.Forms.


Introduction


Xamarin.Forms code runs on multiple platforms - each of which has its own filesystem. This means that reading and writing files is most easily done using the native file APIs on each platform. Alternatively, embedded resources are a simpler solution to distribute data files with an app.

Firebase

Firebase gives you functionality like analytics, databases, messaging and crash reporting so you can move quickly and focus on your users.


Firebase is a backend platform for building Web, Android, and iOS applications. It offers real-time database, different APIs, multiple authentication types and hosting platform. This is an introductory tutorial, which covers the basics of the Firebase platform and explains how to deal with its various components and sub-components.

Build apps with Firebase
  • Real-time Database
  • Storage
  • Notifications
  • Authentication
  • Hosting
Prerequisites
  • Visual Studio 2017 or Later(Windows or Mac)
Setting up a Xamarin.Forms Project

Start by creating a new Xamarin.Forms project. You’ll learn more by going through the steps yourself.or download source here

https://github.com/susairajs/Xamarin-Firebase-RealtimeDatabase

Visual Studio 2019 has more options in the opening window. Clone or check out the code from any repository or, open a project or solution for your computer.

Now, you need to click "Create a new project".


Now, filter by Project Type: Mobile

Choose the Mobile App (Xamarin. forms) project under C# and Mobile.


Name your app. You probably want your project and solution to use the same name as your app. Put it on your preferred location for projects and click "Create".


Now, select the blank app and target platforms - Android, iOS and Windows (UWP).


Subsequently, go to the solution. In there, you get all the files and sources of your project (.NET Standard). Now, select XAML page and double-click to open the MainPage.Xaml page.


You now have a basic Xamarin.Forms app. Click the Play button to try it out.

Create a project in Firebase

In this step, create a project in Firebase. Go to the following link.

https://console.firebase.google.com/

Click "Add Project".


Now, Give the project name and select your country then Read the terms. Afterward, click "Create project".


Now, your project is ready, click continue.


In this step Choose Database under the Project Overview. Now click to Create the database.


In this step, give read and write rules.


Now, your Firebase Realtime Database ready. you can use your database api uri here.


Setting up the User Interface

Go to MainPage.Xaml and write the following code.

MainPage.xaml

Click the Play button to try it out.


NuGet Packages

Now, add the following NuGet Packages.
  • FirebaseDatabase.net
Add FirebaseDatabase.net NuGet

Go to Solution Explorer and select your solution. Right-click and select "Manage NuGet Packages for Solution". Search "FirebaseDatabase.net" and add Package. Remember to install it for each project (.NET Standard, Android, iO, and UWP).


Create a Model

In this step, you can create a model for deserializing your response.

Person.cs

Connect Firebase

Now, Write the following code Connect your Firebase Realtime Database

Read All

Now, write the code to read all data from Firebase Realtime Database.

FirebaseHelper.cs

MainPage.Xaml.cs

Click the Play button to try it out.


Insert

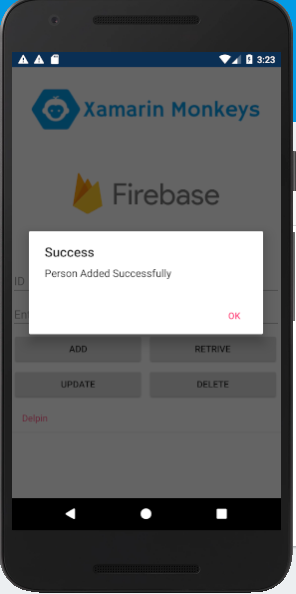
Now, write the following code to insert data into Firebase Realtime Database.

Click the Play button to try it out.


Read

Now, write the following code to read data from Firebase Realtime Database.

Click the Play button to try it out.


Update

Now, write the following code to update data to Firebase Realtime Database.

Click the Play button to try it out.


Delete

Now, write the following code to delete data from Firebase Realtime Database.

Click the Play button to try it out.


Full code

FirebaseHelper.cs

MainPage.Xaml.cs

I hope you have understood, how to use Firebase Realtime Database with CRUD Operations in Xamarin.Forms. Thanks for reading. Please share your comments and feedback.

Happy Coding :)