Introduction
Download Visual Studio


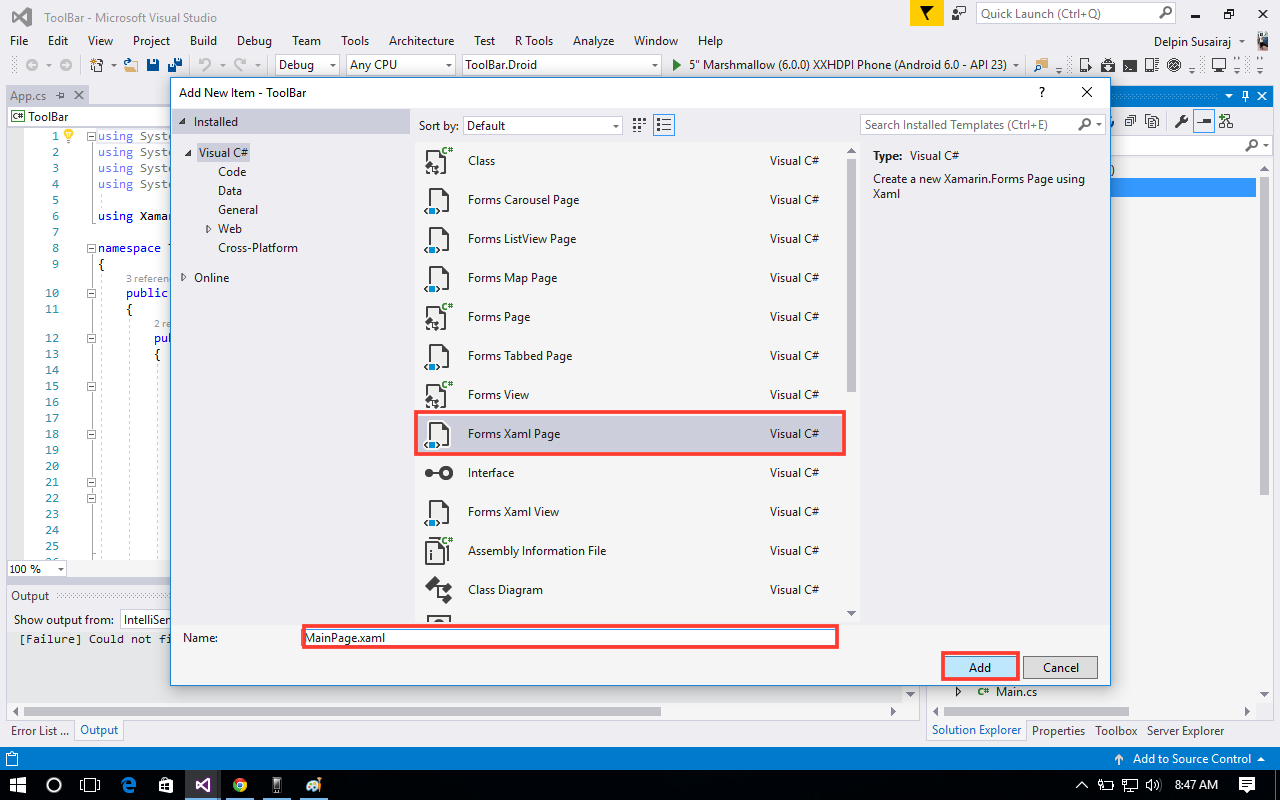


public App()
        {

            MainPage = new MainPage();
        }


using System.Timers;

namespace XamariniOSTimer
{
 public partial class ViewController : UIViewController
 {
  protected ViewController(IntPtr handle) : base(handle)
  {
   // Note: this .ctor should not contain any initialization logic.
  }

  public override void ViewDidLoad()
  {
   base.ViewDidLoad();

   Timer timer = new System.Timers.Timer();

   timer.Interval = 1000;
   timer.Enabled = true;
   timer.Elapsed += Timer_Elapsed;
   timer.Start();


  }

  private void Timer_Elapsed(object sender, ElapsedEventArgs e)
  {

   DateTime myDate = DateTime.Now;

   InvokeOnMainThread(() => { lblTimer.Text = myDate.ToString("F");});

  }

  public override void DidReceiveMemoryWarning()
  {
   base.DidReceiveMemoryWarning();
   // Release any cached data, images, etc that aren't in use.
  }
 }
}


using ToastIOS;

namespace XamariniOSToastNotification
{
public partial class ViewController : UIViewController
{
protected ViewController(IntPtr handle) : base(handle)
{
// Note: this .ctor should not contain any initialization logic.
}
public override void ViewDidLoad()
{
base.ViewDidLoad();
// Perform any additional setup after loading the view, typically from a nib.
}
partial void BtnWarning_TouchUpInside(UIButton sender)
{
Toast.MakeText("This Is Toast Warning")
.SetDuration(5 * 1000)
.Show(ToastType.Warning);
}
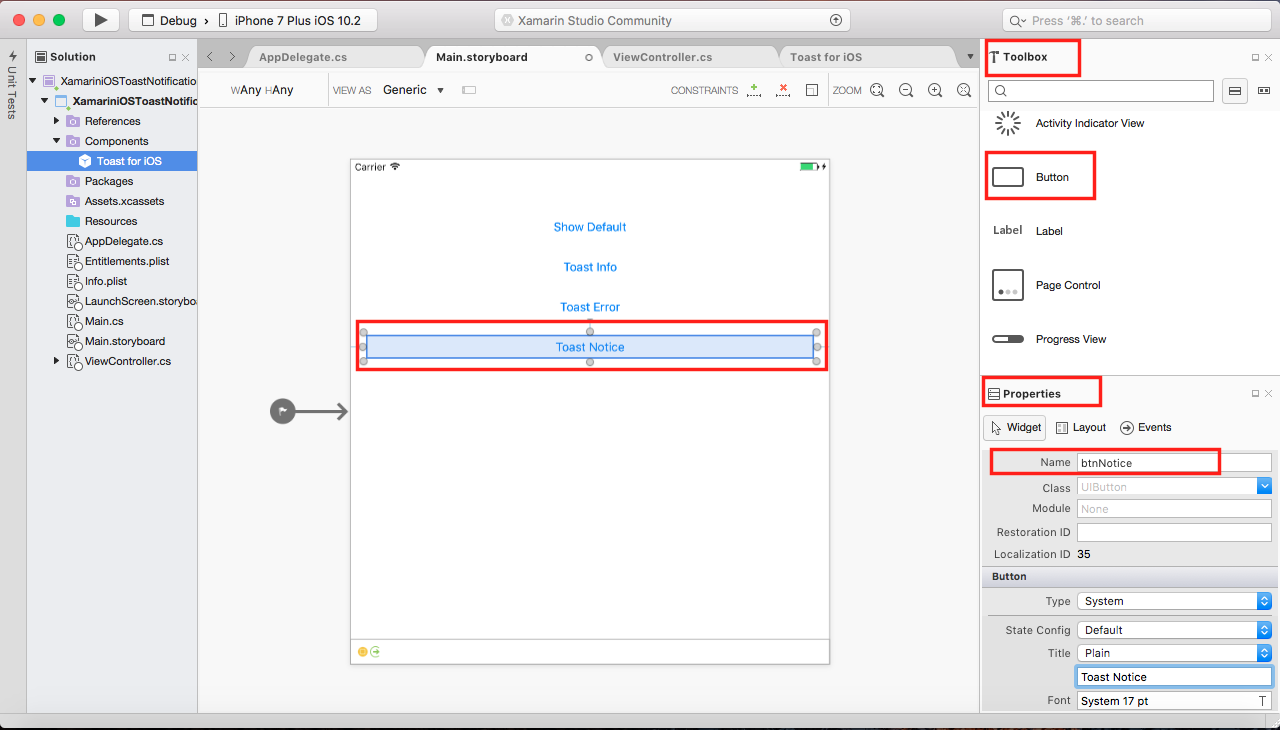
partial void BtnNotice_TouchUpInside(UIButton sender)
{
Toast.MakeText("This Is Toast Notice")
.SetDuration(5 * 1000)
.Show(ToastType.Notice);
}
partial void BtnError_TouchUpInside(UIButton sender)
{
Toast.MakeText("This Is Toast Error")
.SetDuration(5 * 1000)
.Show(ToastType.Error);
}
partial void BtnInfo_TouchUpInside(UIButton sender)
{
Toast.MakeText("This Is Toast Info")
.SetDuration(5 * 1000)
.Show(ToastType.Info);
}
partial void BtnDefault_TouchUpInside(UIButton sender)
{
Toast.MakeText("Hello Xamarin iOS").SetDuration(5*1000).Show();
}
public override void DidReceiveMemoryWarning()
{
base.DidReceiveMemoryWarning();
// Release any cached data, images, etc that aren't in use.
}
}
}


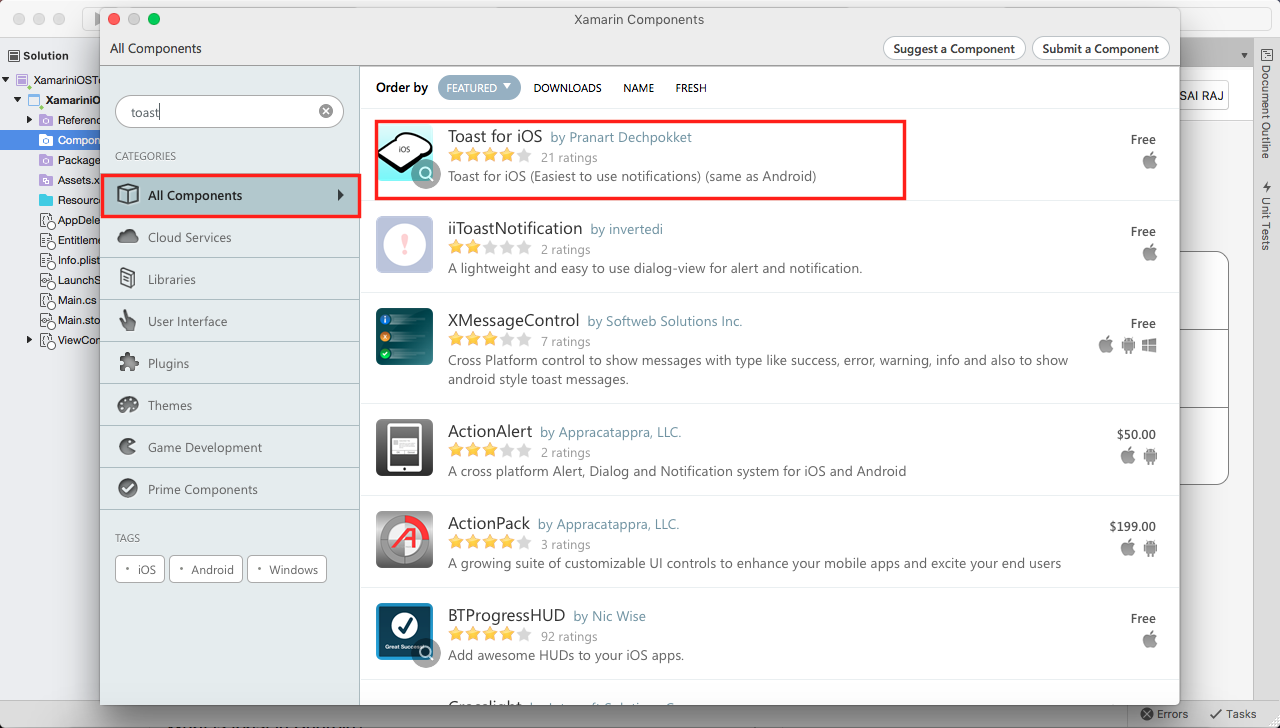


using ToastIOS;

namespace XamariniOSToastNotification
{
 public partial class ViewController : UIViewController
 {
  protected ViewController(IntPtr handle) : base(handle)
  {
   // Note: this .ctor should not contain any initialization logic.
  }

  public override void ViewDidLoad()
  {
   base.ViewDidLoad();
   // Perform any additional setup after loading the view, typically from a nib.
  }

  partial void BtnDefault_TouchUpInside(UIButton sender)
  {

   Toast.MakeText("Hello Xamarin iOS").Show();
  }

  public override void DidReceiveMemoryWarning()
  {
   base.DidReceiveMemoryWarning();
   // Release any cached data, images, etc that aren't in use.
  }
 }
}


