Showing posts with label C#. Show all posts
Delpin Susai Raj Sunday, 24 November 2019

Xamarin.Forms - Bindable Layout

In this blog post, you will learn how to use Bindable Layout in Xamarin.Forms.

Introduction
Xamarin.Forms code runs on multiple platforms - each of which has its own filesystem. This means that reading and writing files is most easily done using the native file APIs on each platform. Alternatively, embedded resources are a simpler solution to distribute data files with an app.

Bindable Layout

Bindable layouts enable any layout class that derives from the Layout<T> class to generate its content by binding to a collection of items, with the option to set the appearance of each item with a DataTemplate. Bindable Layout it's like a ListView.

Bindable Layout Attached properties.
  1. ItemsSource – Gets sets the collection of IEnumerable items to template and display.
  2. ItemDataTemplate – Gets sets DataTemplate to apply to each item in the collection of items displayed layout.
  3. ItemTemplateSelector – DataTemplateSelector that will be used to choose a DataTemplate for an item at runtime.
Prerequisites
  • Visual Studio 2017 or later (Windows or Mac)
Setting up a Xamarin.Forms Project

Start by creating a new Xamarin.Forms project. You wíll learn more by going through the steps yourself.

Create a new or existing Xamarin forms(.Net standard) Project. With Android and iOS Platform.
Bindable Layout

Lets start with how to use Bindable layout in your app instead of listview.

Use Bindable Layout

In this step, use bindable layout in Stacklayout.

MainPage.XAML

Create a Model

Now, Create a simple model to create a collection.

Person.cs

Create a ViewModel

In this step, create a viewmodel to bind the collection to bindable layout.

MainPageViewModel.cs

Selected Item

Use GestureRecognizers for select item from collection, because bindable layout have no ItemSelected event.

MainPage.Xaml


MainPageViewModel.cs


Try it out.
I hope you have understood how to use Bindable Layout in Xamarin.Forms..

Thanks for reading. Please share your comments and feedback. Happy Coding :)
Delpin Susai Raj Tuesday, 24 September 2019

Xamarin.Forms - Working with CarouselView

In this blog post, you will learn how to use CarouselView in Xamarin.Forms.

Introduction

CollectionView

Xamarin.Forms code runs on multiple platforms - each of which has its own filesystem. This means that reading and writing files is most easily done using the native file APIs on each platform. Alternatively, embedded resources are a simpler solution to distribute data files with an app.

CarouselView

CarouselView is available in Xamarin.Forms 4.3. However, it is currently experimental and can only be used by adding the following line of code to your AppDelegate class on iOS, or to your MainActivity class on Android, before calling Forms.Init:

https://docs.microsoft.com/en-us/xamarin/xamarin-forms/user-interface/carouselview/
https://github.com/pauldipietro/CarouselViewChallenge

Prerequisites
  • Visual Studio 2017 or later (Windows or Mac)
  • Xamarin.Forms 4.3 Updated
Setting up a Xamarin.Forms Project

Start by creating a new Xamarin.Forms project. You wíll learn more by going through the steps yourself.

Visual Studio 2019 has more options in the opening window. Clone or check out the code from any repository or, open a project or solution for your computer.

Now, you need to click "Create a new project".

Now, filter by Project Type: Mobile

Choose the Mobile App (Xamarin. forms) project under C# and Mobile.

Name your app. You probably want your project and solution to use the same name as your app. Put it on your preferred location for projects and click "Create".

Now, select the blank app and target platforms - Android, iOS and Windows (UWP).

Subsequently, go to the solution. In there, you get all the files and sources of your project (.NET Standard). Now, select the XAML page and double-click to open the MainPage.Xaml page.

You now have a basic Xamarin.Forms app. Click the Play button to try it out.

Note:

Before you initialize Xamarin.Forms in your MainActivity.cs and AppDelegate, add the following flag.

Android Implementation

MainActivity.cs
iOS Implementation

AppDelegate.cs


Create a Model

Create a Model to Bind the Collections.


ViewModel

Now, Bind the Collection to CarouselView. Similar CollectionView and ListView.

Setting up the User Interface

Go to MainPage.Xaml and write the following code. I just created one CarouselView it's like a collectionview

https://www.c-sharpcorner.com/article/xamarin-forms-collectionview2/

MainPage.xaml


Click the "Play" button to try it out.

I hope you have understood how to use CarouselView in Xamarin.Forms..

Thanks for reading. Please share your comments and feedback. Happy Coding :)
Delpin Susai Raj Thursday, 16 May 2019

Xamarin.Forms - Fast image loading on Android Using GlideX

In this blog post, you will learn how to Fast image loading on Android using GlideX in Xamarin.Forms.


Introduction
Xamarin.Forms code runs on multiple platforms - each of which has its own filesystem. This means that reading and writing files is most easily done using the native file APIs on each platform. Alternatively, embedded resources are a simpler solution to distribute data files with an app.

GlideX Nuget use to fast image loading on Android.

Prerequisites
  • Visual Studio 2017 or later (Windows or Mac)
Setting up a Xamarin.Forms Project

Start by creating a new Xamarin.Forms project. You’ll learn more by going through the steps yourself.

Visual Studio 2019 has more options in the opening window. Clone or check out the code from any repository or, open a project or solution for your computer.

Now, you need to click "Create a new project".
Now, filter by Project Type: Mobile

Choose the Mobile App (Xamarin. forms) project under C# and Mobile.

Name your app. You probably want your project and solution to use the same name as your app. Put it on your preferred location for projects and click "Create".

Now, select the blank app and target platforms - Android, iOS and Windows (UWP).

Subsequently, go to the solution. In there, you get all the files and sources of your project (.NET Standard). Now, select the XAML page and double-click to open the MainPage.Xaml page.

You now have a basic Xamarin.Forms app. Click the Play button to try it out.

NuGet Packages

Now, add the following NuGet packages.
  • glidex.forms                
Go to Solution Explorer and select your solution. Right-click and select "Manage NuGet Packages for Solution". Search for "glidex.forms" and add the resultant package. Remember to install it for each project (.NET Standard, Android, iOS).

Note:

Before you initialize Xamarin.Forms in your MainActivity.cs. you must Initialize FormsMaterial.Init()
Setting up the User Interface

MainPage.xaml

Binding Image

MainPage.xaml.cs

Click the "Play" button to try it out.

I hope you have understood how to Fast image loading on Android using GlideX in Xamarin.Forms..

Thanks for reading. Please share your comments and feedback. Happy Coding :)
Delpin Susai Raj Wednesday, 15 May 2019

Xamarin.Forms - Working with Material Visual

In this blog post, you will learn how to use Material design in Xamarin.Forms.


Introduction
Xamarin.Forms code runs on multiple platforms - each of which has its own filesystem.
This means that reading and writing files is most easily done using the native file APIs on each platform. Alternatively, embedded resources are a simpler solution to distribute data files with an app.

Material

Material Design is introduced Xamarin.Forms 3.6
Material Design is an design system created by Google, that prescribes the size, color, spacing, and other aspects of how views and layouts should look and behave.
  • Visual="Material"
  • Visual="Default"
Note:

On Android, the material renderers require a minimum version of 5.0 (API 21) or greater, and a TargetFramework of version 9.0 (API 28). In addition, your platform project requires Android support libraries 28.0.0 or greater, and its theme needs to inherit from a Material Components theme or continue to inherit from an AppCompat theme.

Material renderers are currently included the following Controls:
  1. Button
  2. Entry
  3. Frame
  4. ProgressBar
  5. DatePicker
  6. TimePicker
  7. Picker
  8. ActivityIndicator
  9. Editor
  10. Slider
  11. Stepper
More information about Material
https://docs.microsoft.com/en-us/xamarin/xamarin-forms/user-interface/visual/material-visual

Prerequisites
  • Visual Studio 2017 or later (Windows or Mac)
Setting up a Xamarin.Forms Project

Start by creating a new Xamarin.Forms project. You’ll learn more by going through the steps yourself.

Visual Studio 2019 has more options in the opening window. Clone or check out the code from any repository or, open a project or solution for your computer.

Now, you need to click "Create a new project".

Now, filter by Project Type: Mobile

Choose the Mobile App (Xamarin. forms) project under C# and Mobile.

Name your app. You probably want your project and solution to use the same name as your app. Put it on your preferred location for projects and click "Create".

Now, select the blank app and target platforms - Android, iOS and Windows (UWP).

Subsequently, go to the solution. In there, you get all the files and sources of your project (.NET Standard). Now, select the XAML page and double-click to open the MainPage.Xaml page.

You now have a basic Xamarin.Forms app. Click the Play button to try it out.

NuGet Packages

Now, add the following NuGet Packages.
  • Xamarin.Forms.Visual.Material
Add Xamarin.Forms.Visual.Material NuGet

Go to Solution Explorer and select your solution. Right-click and select "Manage NuGet Packages for Solution". Search "Xamarin.Forms.Visual.Material" and add Package. Remember to install it for each project (.NET Standard, Android, iOS).

Note :

Before you initialize Xamarin.Forms in your MainActivity.cs and AppDelegate. you must Initialize FormsMaterial.Init()

Android Implementation

MainActivity.cs

iOS Implementation

AppDelegate.cs

Setting up the User Interface

In this step, added material design.

Click the "Play" button to try it out.

Android Design
iOS Design

I hope you have understood how to use Material design in Xamarin.Forms..

Thanks for reading. Please share your comments and feedback.
Happy Coding :)
Delpin Susai Raj Tuesday, 14 May 2019

Xamarin.Forms - Working with Azure Blob Storage

In this blog post, you will learn how to use Azure Blob Storage in Xamarin.Forms.


Introduction

Xamarin.Forms code runs on multiple platforms - each of which has its own filesystem. This means that reading and writing files is most easily done using the native file APIs on each platform. Alternatively, embedded resources are a simpler solution to distribute data files with an app.

Azure Blob storage

Azure Blob storage is Microsoft's object storage solution for the cloud. Blob storage is optimized for storing massive amounts of unstructured data.
Store any type of unstructured data—including images, videos, audio, documents and backups. you can write error log also.

Prerequisites

  • Visual Studio 2017 or later (Windows or Mac)
  • Microsft Azure subscription

Setting up a Xamarin.Forms Project

Start by creating a new Xamarin.Forms project. You’ll learn more by going through the steps yourself.

Visual Studio 2019 has more options in the opening window. Clone or check out the code from any repository or, open a project or solution for your computer.

Now, you need to click "Create a new project".

Now, filter by Project Type: Mobile

Choose the Mobile App (Xamarin. forms) project under C# and Mobile.

Name your app. You probably want your project and solution to use the same name as your app. Put it on your preferred location for projects and click "Create".

Now, select the blank app and target platforms - Android, iOS and Windows (UWP).

Subsequently, go to the solution. In there, you get all the files and sources of your project (.NET Standard). Now, select the XAML page and double-click to open the MainPage.Xaml page.

You now have a basic Xamarin.Forms app. Click the Play button to try it out.

Create a Storage Account in Azure

http://portal.azure.com

In this step, you must create Storage account service in azure portal.
more about storage account https://docs.microsoft.com/en-us/azure/storage/common/storage-account-overview
After creating storage account, check your access keys and connection strings.

Setting up the User Interface

Go to MainPage.Xaml and write the following code.

MainPage.xaml


NuGet Packages

Now, add the following NuGet packages.

  1. Xam.Plugin.Media
  2. Microsoft.Azure.Storage.Blob

Add Microsoft.Azure.Storage.Blob NuGet

Go to Solution Explorer and select your solution. Right-click and select "Manage NuGet Packages for Solution". Search for "Microsoft.Azure.Storage.Blob" and add the resultant package. Remember to install it for each project (.NET Standard, Android, iOS).

Connect your Storage Account

Pick Files

In this step, i'm going to upload images.


Upload Files

Now, write the following code to upload files to azure blob storage.


Download Files

Use following code to download files from azure blob storage.

Delete Files

Use following code to Delete files from azure blog storage.

Check out Full Code
MainPage.xaml.cs

Click the "Play" button to try it out.


I hope you have understood how to use Azure Blob Storage in Xamarin.Forms..

Thanks for reading. Please share your comments and feedback. Happy Coding :)
Delpin Susai Raj Wednesday, 24 April 2019

Xamarin.Forms - Custom Entry

In this blog post, you will learn how to create a borderless entry with rounded corner in Xamarin.Forms.

Introduction

Xamarin.Forms code runs on multiple platforms - each of which has its own filesystem. This means that reading and writing files is most easily done using the native file APIs on each platform. Alternatively, embedded resources are a simpler solution to distribute data files with an app.

Custom Renderers

Xamarin.Forms user interfaces are rendered using the native controls of the target platform, allowing Xamarin.Forms applications to retain the appropriate look and feel for each platform. Custom Renderers let developers override this process to customize the appearance and behavior of Xamarin.Forms controls on each platform.

Prerequisites


  • Visual Studio 2017 or later (Windows or Mac)

Setting up a Xamarin.Forms Project

Start by creating a new Xamarin.Forms project. You’ll learn more by going through the steps yourself.

Visual Studio 2019 has more options in the opening window. Clone or check out the code from any repository or, open a project or solution for your computer.

Now, you need to click "Create a new project".
Now, filter by Project Type: Mobile

Choose the Mobile App (Xamarin. forms) project under C# and Mobile.

Name your app. You probably want your project and solution to use the same name as your app. Put it on your preferred location for projects and click "Create".

Now, select the blank app and target platforms - Android, iOS and Windows (UWP).

Subsequently, go to the solution. In there, you get all the files and sources of your project (.NET Standard). Now, select the XAML page and double-click to open the MainPage.Xaml page.

You now have a basic Xamarin.Forms app. Click the Play button to try it out.

Create a Custom Entry

Now, create an Inherit class form Entry for Customizing the Entry control.
write the following code.

CustomEntry.cs

Android Implementation

In this step, create an inherit Class form, EntryRenderer for customizing the Entry control.

Now, write the code given below.

CustomEntryRenderer.cs

iOS Implementation

In this step, create an inherit Class form, EntryRenderer for customizing the Entry control.

Now, write the code given below.

CustomEntryRenderer.cs

Setting up the User Interface

Go to MainPage.Xaml and write the following code.

MainPage.xaml

Click the "Play" button to try it out.


I hope you have understood how to create a borderless entry with rounded corner in Xamarin.Forms..
Thanks for reading. Please share your comments and feedback. Happy Coding :)
Delpin Susai Raj Thursday, 21 February 2019

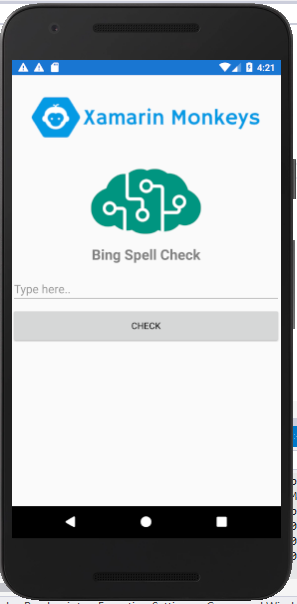
Xamarin.Forms - Bing Spell Check Using Cognitive Service

In this blog post, you will learn how to Detect and correct spelling mistakes in your app using Cognitive Service Bing Spell Check API in Xamarin forms.

Introduction


Xamarin.Forms code runs on multiple platforms - each of which has its own filesystem. This means that reading and writing files is most easily done using the native file APIs on each platform. Alternatively, embedded resources are a simpler solution to distribute data files with an app.

Cognitive Services

Xamarin and Cognitive Services together can infuse your apps, websites, and bots with intelligent algorithms to see, hear, speak, understand and interpret your user needs through natural methods of communication. Also, they help you transform your business with AI today.

Use AI to solve business problems

  • Vision
  • Speech
  • Knowledge
  • Search
  • Language

Bing Spell Check API
  1. Bing Spell Check API help users correct spelling errors, recognise the difference among names, brand names and slang, as well as understand homophones as they are typing.
  2. Bing Spell Check API has developed a web-based spell-checker.
  3. Bing Spell Check API returns a list of words it does recognize with suggested replacements.


Prerequisites

  • Visual Studio 2017 or Later(Windows or Mac)
  • Bing Spell Check API Key

Setting up a Xamarin.Forms Project

Start by creating a new Xamarin.Forms project. You’ll learn more by going through the steps yourself.
Visual Studio 2019 has more options in the opening window. Clone or check out the code from any repository or, open a project or solution for your computer.
Now, you need to click "Create a new project".

Now, filter by Project Type: Mobile
Choose the Mobile App (Xamarin. forms) project under C# and Mobile.
 Name your app. You probably want your project and solution to use the same name as your app. Put it on your preferred location for projects and click "Create".
 Now, select the blank app and target platforms - Android, iOS and Windows (UWP).

Subsequently, go to the solution. In there, you get all the files and sources of your project (.NET Standard). Now, select XAML page and double-click to open the MainPage.Xaml page.
 You now have a basic Xamarin.Forms app. Click the Play button to try it out.

Get Bing Spell Check API Key

 In this step, get Bing Spell Check API Key. Go to the following link.
https://azure.microsoft.com/en-in/services/cognitive-services/

Click "Try Cognitive Services for free".


Now, you can choose Bing Spell Check API under Language APIs. Afterward, click "Get API Key".

Now, the API key is activated. You can use it now.
Note
The trial key is available only for 7 days.

Setting up the User Interface

Go to MainPage.Xaml and write the following code.
MainPage.xaml


Click the play button to try it out.

NuGet Packages
Now, add the following NuGet Packages.
  • Newtonsoft.Json
Add Newtonsoft.Json NuGet
Go to Solution Explorer and select your solution. Right-click and select "Manage NuGet Packages for Solution". Search "Newtonsoft.Json" and add Package. Remember to install it(.NET Standard).

Create a Model
In this step, you can create a model for Deserializing your response.
ResponseModel.cs


Bing Spell Check.
In this step, write the following code for Bing Spell Check.
Note:
Try out the spell check capabilities with Bing Spell Search API v7.

  • ‘Spell’ is more aggressive in order to return better search results,
  • ‘Proof’ is less aggressive and adds capitalisation, basic punctuation and other features to aid document creation.
MainPage.xaml.cs


Click the Play button to try it out.

I hope you have understood how to Detect and correct spelling mistakes in your app using Cognitive Service Bing Spell Check API in Xamarin.Forms.

More Sample from Github 

Thanks for reading. Please share comments and feedback. Happy Coding :)

Delpin Susai Raj Thursday, 7 February 2019

Xamarin.Forms - Working with LiteDB CRUD Operations

In this blog post , you will learn how to use LiteDB Database with CRUD Operations in Xamarin.Forms.


Introduction


Xamarin.Forms code runs on multiple platforms - each of which has its own filesystem. This means that reading and writing files is most easily done using the native file APIs on each platform. Alternatively, embedded resources are a simpler solution to distribute data files with an app.

LiteDB


  1. LiteDB is serverless database. fully written in C# code.
  2. LiteDB stores documents in the BSON (Binary JSON) data format like MongoDB.
  3. LiteDB is a simple and fast NoSQL database. use to build Mobile, Desktop and small web applications. 


Prerequisites


  • Visual Studio 2017 or Later(Windows or Mac)


Setting up a Xamarin.Forms Project

Start by creating a new Xamarin.Forms project. You’ll learn more by going through the steps yourself.or download source here

https://github.com/susairajs/XamarinForms-LiteDB

Visual Studio 2019 has more options in the opening window. Clone or check out the code from any repository or, open a project or solution for your computer.

Now, you need to click "Create a new project".


Now, filter by Project Type: Mobile
Choose the Mobile App (Xamarin. forms) project under C# and Mobile.

Name your app. You probably want your project and solution to use the same name as your app. Put it on your preferred location for projects and click "Create".

Now, select the blank app and target platforms - Android, iOS and Windows (UWP).
Subsequently, go to the solution. In there, you get all the files and sources of your project (.NET Standard). Now, select XAML page and double-click to open the MainPage.Xaml page.

You now have a basic Xamarin.Forms app. Click the Play button to try it out.


Setting up the User Interface

Go to MainPage.Xaml and write the following code.

MainPage.xaml


Click the Play button to try it out.


NuGet Packages

Now, add the following NuGet Packages.


  • LiteDB


Add LiteDB NuGet

Go to Solution Explorer and select your solution. Right-click and select "Manage NuGet Packages for Solution". Search "LiteDB" and add Package. Remember to install it for .NET Standard project.


Create a Model

In this step, you can create a model to Create a Table.

Person.cs


Get Local File Path

Now, Write the following code to get local file path for storing the database in App.xaml.cs

App.xaml.cs


Create a Table 

In this step, Write the following code to create a LiteCollection and create the table in LiteDBHelper.cs constructor.

LiteDBHelper.cs


Check Database 

if you need to explore your LiteDB database download LiteDBViewer 

https://github.com/falahati/LiteDBViewer/releases

Example 


Read All

Now, write the code to read all data from LiteDB Database.

LiteDBHelper.cs


MainPage.Xaml.cs


Click the Play button to try it out.


Insert

Now, write the following code to insert data into LiteDB Database.


Click the Play button to try it out.


Read

Now, write the following code to read data from LiteDB Database.


Click the Play button to try it out.


Update

Now, write the following code to update data to LiteDB Database.


Click the Play button to try it out.


Delete

Now, write the following code to delete data from LiteDB Database.


Click the Play button to try it out.


Full code

LiteDBHelper.cs


MainPage.Xaml.cs


I hope you have understood, how to use LiteDB Database with CRUD Operations in Xamarin.Forms. Thanks for reading. Please share your comments and feedback.

Happy Coding :)
Delpin Susai Raj Wednesday, 6 February 2019

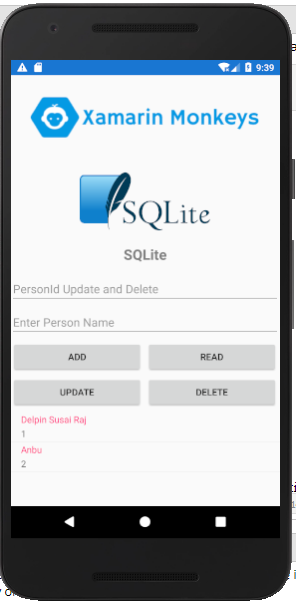
Xamarin.Forms - SQLite Database CRUD Operations

In this blog post, you will learn how to use SQLite Database with CRUD Operations in Xamarin.Forms.


Introduction


Xamarin.Forms code runs on multiple platforms - each of which has its own filesystem. This means that reading and writing files is most easily done using the native file APIs on each platform. Alternatively, embedded resources are a simpler solution to distribute data files with an app.

SQLite


  1. SQLite is a Light weight database that implements a small, fast, self-contained, high-reliability, full-featured, SQL database engine. 
  2. SQLite is the most used database in the world. It is built into all mobile phones.


Prerequisites


  • Visual Studio 2017 or Later(Windows or Mac)


Setting up a Xamarin.Forms Project

Start by creating a new Xamarin.Forms project. You’ll learn more by going through the steps yourself.or download source here

https://github.com/susairajs/XamarinForms-SQLite

Visual Studio 2019 has more options in the opening window. Clone or check out the code from any repository or, open a project or solution for your computer.

Now, you need to click "Create a new project".


Now, filter by Project Type: Mobile
Choose the Mobile App (Xamarin. forms) project under C# and Mobile.

Name your app. You probably want your project and solution to use the same name as your app. Put it on your preferred location for projects and click "Create".

Now, select the blank app and target platforms - Android, iOS and Windows (UWP).
Subsequently, go to the solution. In there, you get all the files and sources of your project (.NET Standard). Now, select XAML page and double-click to open the MainPage.Xaml page.

You now have a basic Xamarin.Forms app. Click the Play button to try it out.


Setting up the User Interface

Go to MainPage.Xaml and write the following code.

MainPage.xaml


Click the Play button to try it out.


NuGet Packages

Now, add the following NuGet Packages.


  • sqlite-net-pc


Add sqlite-net-pc NuGet

Go to Solution Explorer and select your solution. Right-click and select "Manage NuGet Packages for Solution". Search "sqlite-net-pc" and add Package. Remember to install it for each project (.NET Standard, Android, iO, and UWP).


Create a Model

In this step, you can create a model for create a table.

Person.cs


Get Local File Path

Now, Write the following code to get local file path for storing the database in App.xaml.cs

App.xaml.cs


Create a Table 

In this step, Write the following code to create a SQLite Connection and create the table in SQLiteHelper.cs constructor.

SQLiteHelper.cs


Read All

Now, write the code to read all data from SQLite Database.

SQLiteHelper.cs


MainPage.Xaml.cs


Click the Play button to try it out.


Insert

Now, write the following code to insert data into SQLite Database.


Click the Play button to try it out.


Read

Now, write the following code to read data from SQLite Database.


Click the Play button to try it out.


Update

Now, write the following code to update data to SQLite Database.


Click the Play button to try it out.


Delete

Now, write the following code to delete data from SQLite Database.


Click the Play button to try it out.


Full code

SQLiteHelper.cs


MainPage.Xaml.cs


I hope you have understood, how to use SQLite Database with CRUD Operations in Xamarin.Forms. Thanks for reading. Please share your comments and feedback.

Happy Coding :)