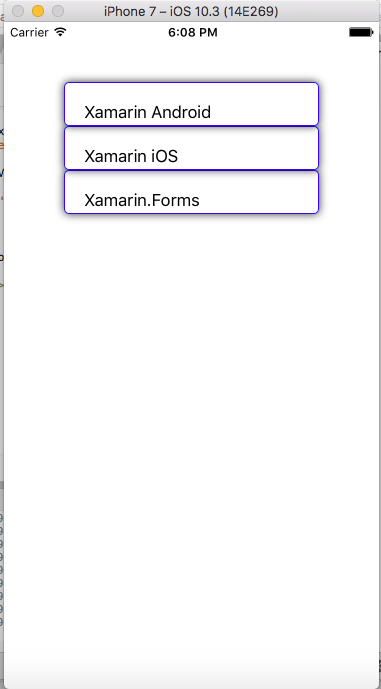
In this article you will learn how to use Border Shadow Effects Using Frame Renderer in your controls in Xamarin forms.
IntroductionXamarin is a platform to develop cross-platform and multi-platform apps (for example, Windows phone, Android, iOS).
In Xamarin platform, the code sharing concept is used. In Xamarin Studio, Visual Studio is also available.


Frame
1.HasShadow. = true or false, to indicate whether to show a shadow effect where the platform supports it.
2 .OutlineColor = A color specification, with or without the prefix, "Color". For example, "Color.Red" and "Red" both specify the color red.
Prerequisites
- Visual Studio 2017(Windows or Mac)
Setting up a Xamarin.Forms Project
Start by creating a new Xamarin.Forms project. If you want, you’ll learn more by going through the steps yourself.
Choose the Xamarin.Forms App Project type under Cross-platform/App in the New Project dialog.

Name your app, select “Use Portable Class Library” for shared code, and target both Android and iOS.

You probably want your project and solution to use the same name as your app. Put it in your preferred folder for projects and click Create.

You now have a basic Xamarin.Forms app. Click the play button to try it out.

Creating Your Model(ListValue)
ListValue.cs

Setting up the User Interface.
Go MainPage.Xaml and write following code.
MainPage.Xaml

In this Step Add Data to Listview.
MainPage.Xaml.cs


Now, Create a Frame Inherit class for customise the Frame control.
Go to Solution—>Empty Class—> MyFrame.cs
MyFrame.cs

Making Your Android Frame Shadows
In this step Create xml file rounded design for customizing frame control.
Go to Solution.Droid—>Empty XML File—> FrameRenderValue.xml. then click Create.

Now, Write the following code in your xml file.
FrameRenderValue.xml

In this step Create a Android FrameRenderer inherit class for customizing frame control
Go to Solution.Droid—>Empty Class—> FrameRenderer

Now write the following code between OnElementChanged override method.
FrameRenderer.cs

Making Your iOS Frame Shadows
In this step Create a iOS FrameRenderer inherit class for customizing frame control
Go to Solution.iOS—>Empty Class—> FrameRenderer

Now write the following code between OnElementChanged override method.
FrameRenderer.cs

Now Add Customise frame control in your app.
MainPage.xaml

Click the play button to try it out.
You can see the Wonderful Border shadow Effect using frame renderer in your Controls.
Summary
This was the process of how to use Border Shadow effect using Custom Frame Renderer in your controls in Xamarin.Forms.
Thanks For Reading.
Please share comments and feedback.