Showing posts with label NSUserDefaults. Show all posts
Delpin Susai Raj Friday, 9 March 2018

Xamarin.Forms - Working with Application Storage

This article covers working with Application Storage to save app settings on app in xamarin forms App.


Introduction

Xamarin.Forms code runs on multiple platforms - each of which has its own filesystem. This means that reading and writing files are the most easily done tasks using native file APIs on each platform. Alternatively, embedded resources are also a simpler solution to distribute the data files with an app.


Application Storage

Xamarin Android - Shared Preferences

Android provides many ways of storing data of an application. One of this way is called Shared Preferences. Shared Preferences allow you to save and retrieve data in the form of key,value pair.
In order to use shared preferences, you have to call a method getSharedPreferences() that returns a SharedPreference instance pointing to the file that contains the values of preferences.

Xamarin iOS - NSUserDefaults 

The NSUserDefaults class provides a way for iOS Apps and Extensions to programmatically interact with the system-wide Default System. By using the Defaults System, the user can configure an app's behavior or styling to meet their preferences (based on the design of the app). For example, to present data in Metric vs Imperial measurements or select a given UI Theme.

UWP -  ApplicationDataContainer

Represents a container for app settings. The methods and properties of this class support creating, deleting, enumerating, and traversing the container hierarchy.

Xamarin Forms - Properties Dictionary

The Application subclass has a static Properties dictionary which can be used to store data, in particular for use in the OnStart, OnSleep, and OnResume methods. This can be accessed from anywhere in your Xamarin.Forms code using Application.Current.Properties.
The Properties dictionary uses a string key and stores an object value.


Prerequisites
  • Visual Studio 2017(Windows or Mac)
Setting up a Xamarin.Forms Project

Start by creating a new Xamarin.Forms project. You’ll learn more by going through the steps yourself.

Choose the  Cross-platform App project under Visual C#-->Cross-platform in the New Project dialog.


Now Select the Blank App and Choose Portable Class Library(PCL).
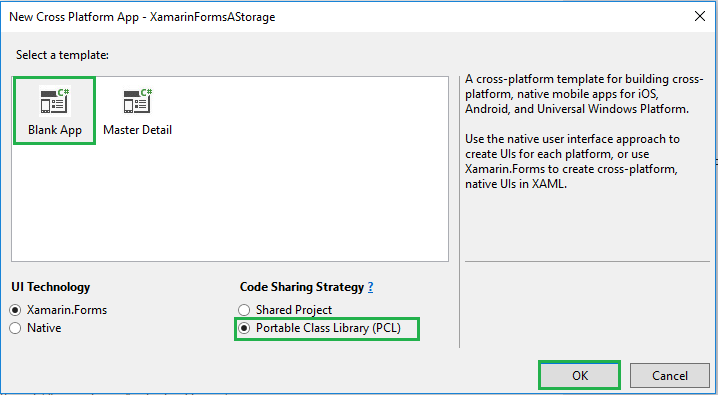


You now have a basic Xamarin.Forms app. Click the Play button to try it out.


Setting up the User Interface.

Go to MainPage.Xaml and write the following code.

MainPage.Xaml


Store Value

The Properties dictionary uses a string key and stores an object value.

Now, write the following code on BtnStore_Clicked event.

MainPage.Xaml.cs


Get Value

The Properties dictionary stores objects so you need to cast its value before using it.

Now, write the following code on BtnGet_Clicked event.

MainPage.Xaml.cs


Remove Value

If you want to remove values, you can remove it.

Now, write the following code on BtnRemove_Clicked event.

MainPage.Xaml.cs


Clear Values

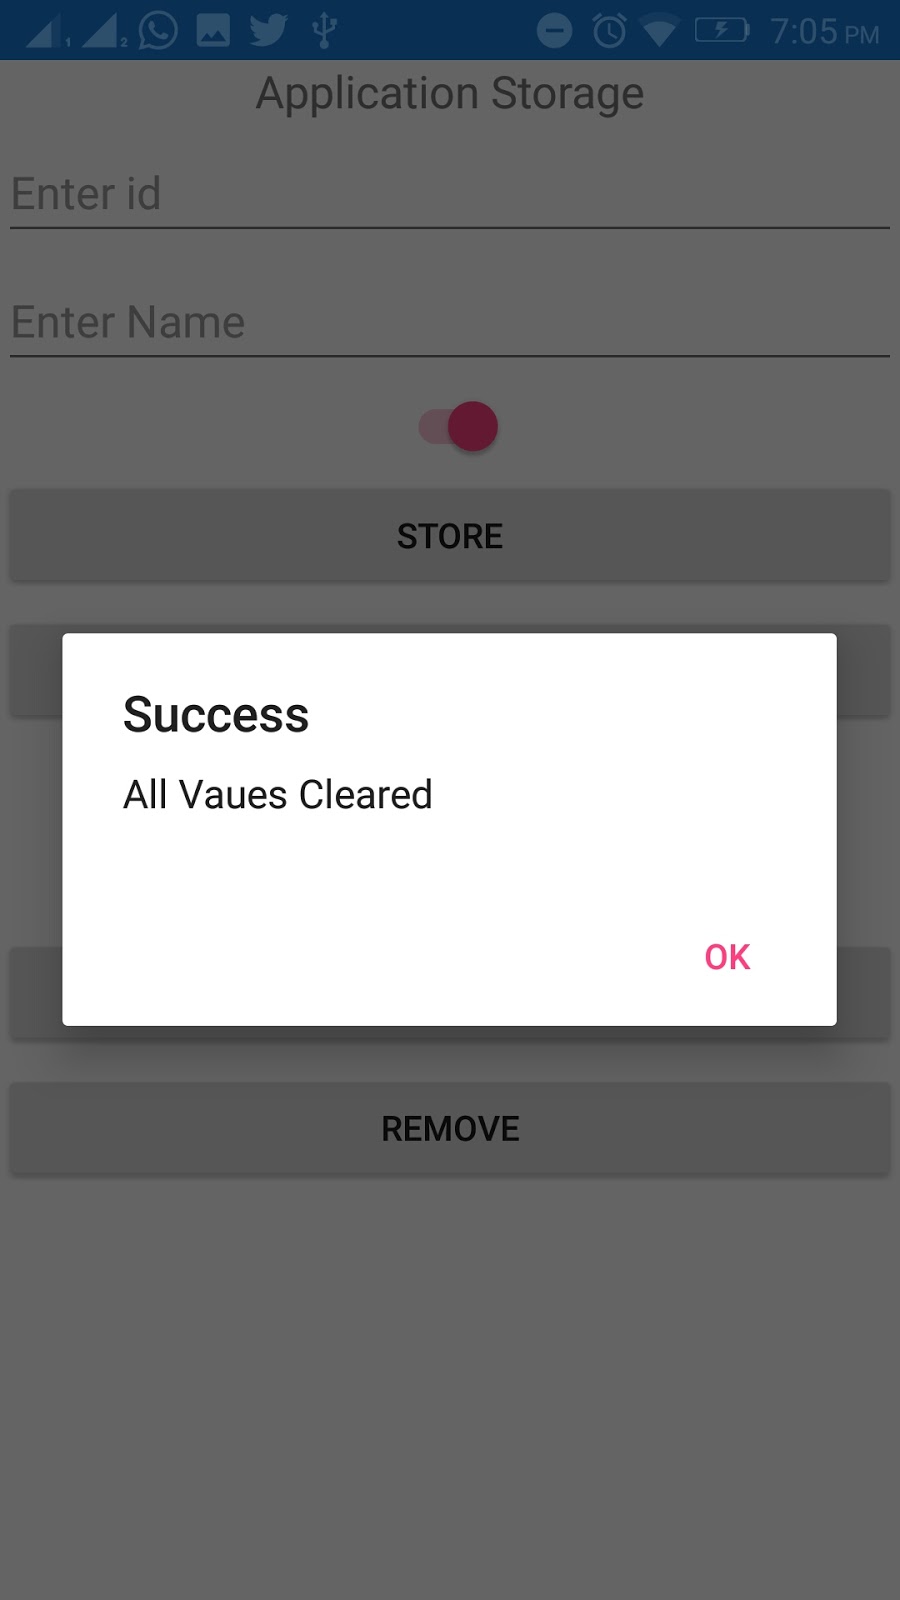
If you want clear all Properties.you can following code.

Now, write the following code on BtnClear_Clicked event.

MainPage.Xaml.cs


Full Code

MainPage.Xaml.cs

Click the Play button to try it out.


I hope you have understood how to use Application Storage in Xamarin forms

Thanks for reading. Please share comments and feedback.

Delpin Susai Raj Friday, 21 July 2017

NSUserDefaults in Xamarin iOS

In this article, you will learn how to Use NSUserDefaults  in Xamarin iOS, using Xamarin Studio.

Introduction

Xamarin is a platform to develop cross-platform and multi-platform apps (for example, Windows phone, Android, iOS). In Xamarin platform, the code sharing concept is used. In Xamarin Studio, Visual Studio is also available.

iOS provides many ways of storing data of an application. One of this way is called NSUserDefaults. S NSUserDefaults allow you to save and retrieve data in the form of key, value pair.


Browse Code Here.


Prerequisites


  • Xamarin Studio.
  • Xcode.


The steps given below are required to be followed in order to Use NSUserDefaults in Xamarin iOS, using Xamarin Studio.


Step 1

Go To Xamarin Studio.
Click New Solution—> select iOS—>select App--> Choose single View App. Afterwards, click Next.


Step 2

In this step, configure your app. Give the app name (Ex:sample), Organization Identifier. Afterwards, click Next.


Step 3

In this step, give your project name (Ex: Sample) and solution name (Ex: Sample). Give the path of your project. Afterwards, click Create.


Step 4

Subsequently, go to the solution. In the solution, get all the files and sources in your project. Now, select Main.storyboard and double click to open Main.storyboard page.


Step 5

After opening the Main.storyboard, you can design this page, as per your desire.


Step 7

In this step design your app.using storyboard, Toolbox and Properties.


  1. Text Field(txtString)
  2. Text Field(txtInteger)
  3. Button(btnStore)
  4. Label(lblString)
  5. Label(lblInteger)
  6. Label(lblBoolean)


Step 8

In this step, go to the ViewController.cs page. write the code given below.

ViewController.cs 

//ViewController
using System;
using UIKit;
using Foundation;

namespace XamariniOSUserDefaults
{
 public partial class ViewController : UIViewController
 {
  NSUserDefaults storevalues = new NSUserDefaults();

  protected ViewController(IntPtr handle) : base(handle)
  {
   // Note: this .ctor should not contain any initialization logic.
  }
  public override void ViewDidLoad()
  {
   base.ViewDidLoad();
   // Perform any additional setup after loading the view, typically from a nib.
   switchOnOff.On = false;
   switchOnOff.ValueChanged += (sender, e) =>
   {
    if (switchOnOff.On == true)
    {
        //Store value on Userdefaults
     storevalues.SetBool(switchOnOff.On = true, "swithvalue");
    }
    else
    {
                    //Store value on Userdefaults
     storevalues.SetBool(switchOnOff.On = false, "swithvalue");
    }
   };
  }
  partial void UIButton12_TouchUpInside(UIButton sender)
  {
            //Store value on Userdefaults
   storevalues.SetString(txtString.Text, "stringvalue");
   storevalues.SetInt(Int32.Parse(txtInteger.Text), "integervalue");

   //Get values form Userdefaults

   lblString.Text = storevalues.StringForKey("stringvalue");
   lblInteger.Text = storevalues.IntForKey("integervalue").ToString();
   lblBoolean.Text = storevalues.BoolForKey("swithvalue").ToString();;


  }

  public override void DidReceiveMemoryWarning()
  {
   base.DidReceiveMemoryWarning();
   // Release any cached data, images, etc that aren't in use.
  }
 }
}


Step 9

Now, go to Run option , choose Debug and the list of iPhone and iPad simulators, which are available. You can choose any one simulator and run it.


Output

After a few seconds, the app will start running on your iPhone simulator.You will see your app working successfully.


You can fill input fields and click Store. you will see the data store and retrieve successfully.


Summary

This was the process of how to Use NSUserDefaults in Xamarin iOS , using Xamarin Studio.