Showing posts with label MVVM. Show all posts
Delpin Susai Raj Wednesday, 27 October 2021

Xamarin.Forms - Validation using Fluent Validation in MVVM

In this blog post, you will learn how to use fluent validation in MVVM in Xamarin.Forms App

Introduction

Xamarin.Forms code runs on multiple platforms - each of which has its own filesystem. This means that reading and writing files is most easily done using the native file APIs on each platform. Alternatively, embedded resources are a simpler solution to distribute data files with an app.

Fluent Validation

Fluent Validation is one of the best Libraries for Xamarin.Forms it's used to validate XAML Controls. Fluent Validation is used to create the validation logic separate from business logic. Fluent validation is used to lambda expressions for building validation rules for your business objects.

References

https://github.com/james-russo/XamarinForms-UnobtrusiveValidationPlugin

Prerequisites

  • Visual Studio 2017 or later (Windows or Mac)

Let's Start

Setting up a Xamarin.Forms Project

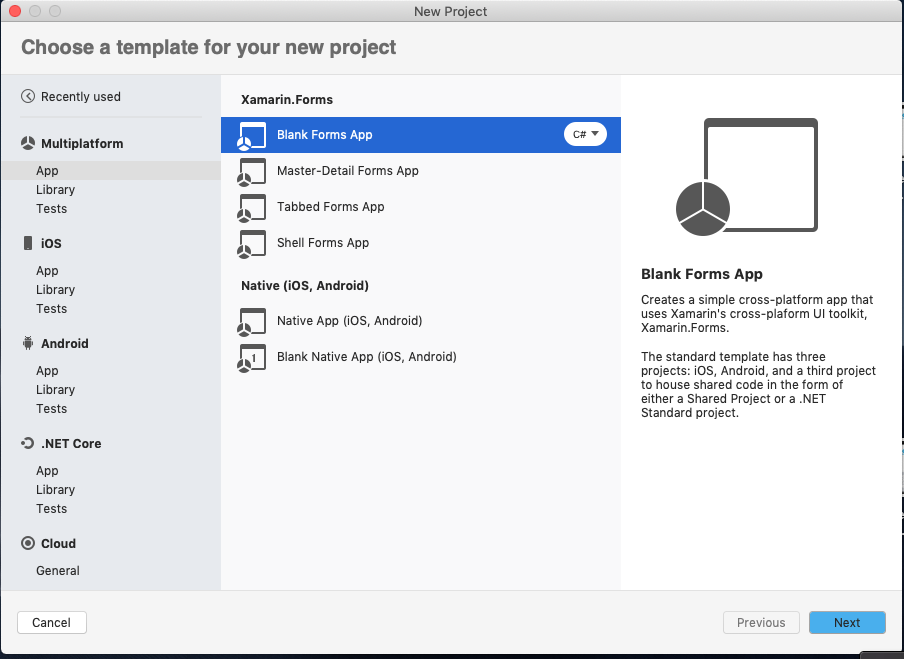
Start by creating a new Xamarin.Forms project. You will learn more by going through the steps yourself. 

Create a new or existing Xamarin forms(.Net standard) Project. With Android and iOS Platform. 

Setup UI

Now, Create a UI for your requirement. I just created a simple login page for validation purposes.

LoginPage.xaml

LoginPageViewModel

Here, you can write your business logic for your requirement. I just add simple login validation only. LoginCommand will validate the login form.

LoginPageViewModel.cs

Install Fluent Validation NuGet

Install the following Nuget from Nuget Package Manager In your Visual Studio.

Fluent Validation

Create Fluent Validator

Now, Create a validator class in .Net Standard or PCL Library for your ViewModel or your business logic. I create LoginValidator for my LoginPageViewModel.

LoginValidation.cs

Here I just added the NotNull check validation with the failure message. You can explore more features for the Fluent validation

https://github.com/james-russo/XamarinForms-UnobtrusiveValidationPlugin

Result

The below image for login validation failed.

The Login validation is Success

Conclusion

I hope you have understood how to validate objects using fluent validation in MVVM in Xamarin.Forms App

Thanks for reading. Please share your comments and feedback. Happy Coding :)

Delpin Susai Raj Tuesday, 26 October 2021

Xamarin.Forms - How to use Fody property in MVVM

 In this blog post, you will learn how to use Fody in MVVM in Xamarin.Forms App

Introduction

Xamarin.Forms code runs on multiple platforms - each of which has its own filesystem. This means that reading and writing files is most easily done using the native file APIs on each platform. Alternatively, embedded resources are a simpler solution to distribute data files with an app.

Fody

Fody is a library for IL weaving (the process to manipulate/inject code in IL). Fody will update automatically our code for us to add new cool features.

Fody is Injects code which raises the PropertyChanged event, into property setters of classes which implement INotifyPropertyChanged.

Prerequisites

  • Visual Studio 2017 or later (Windows or Mac)

Let's Start

Setting up a Xamarin.Forms Project

 Start by creating a new Xamarin.Forms project. You will learn more by going through the steps yourself.

 Create a new or existing Xamarin forms(.Net standard) Project. With Android and iOS Platform. 

Setup UI

Now, Create a UI for your requirement. I just created a simple UI for LoginPage

LoginPage.xaml

Normal Property Creation with Data Binding

The Data Binding is the connection between the XAML and ViewModel of your app. You use it to connect a control (ex: text) of your UI to your logic. Let’s assume that we have an Entry and we want to link it to our ViewModel.

Following code is as we use to create the view model property be like.

LoginPage.Xaml.cs

Result

Install Fody

Install the following Nuget from Nuget Manager In your Visual Studio.

  1. Fody
  2. PropertyChanged.Fody
In your project install the Fody plugin (only in your PCL/.Net Standard project, you don’t need to install it in the Android, iOS, UWP projects

Fody NuGet

PropertyChanged.Fody

Add FodyWeavers.xml

Add FodyWeavers.xml file in your .net standard project.

Fody Properties

Now, Simply add property with { get; set; }. 

Result

Conclusion

I hope you have understood how to use fody in MVVM in Xamarin.Forms App

Thanks for reading. Please share your comments and feedback. Happy Coding :)

Delpin Susai Raj Wednesday, 15 January 2020

Xamarin.Forms - Getting started with Prism

In this blog post, you will learn how to use Prism in existing Xamarin.Forms app.

Introduction

Xamarin.Forms code runs on multiple platforms - each of which has its own filesystem. This means that reading and writing files are most easily done using the native file APIs on each platform. Alternatively, embedded resources are a simpler solution to distribute data files with an app.

MVVM

MVVM - Model View ViewModel
MVVM Is the design pattern to separate the user interface & business logic concerns. I suppose that you heard something about it. This pattern created by Microsoft is widely used with applications created with .NET Framework but not only because you can also use it with Xamarin.

Prism
Prism is a framework for building loosely coupled, maintainable, and testable XAML applications in WPF, Windows 10 UWP, and Xamarin Forms. Prism provides an implementation of a collection of design patterns that are helpful in writing well-structured and maintainable XAML applications, including MVVM, dependency injection, commands, EventAggregator, and others.

Prism Containers
  1. Unity
  2. DryIoc
Unity is the container I use and recommend the most. Unity is the most popular container due to it being the container that Brian has used for years and it is the first (and for a long time only) container available in the Templates. Unity is also about average with regards to its benchmark performance.

DryIoc is the container It's under active development, it's very fast, and works well with the current release of Prism. Also important is that when I have had questions or issues the maintainer has been very quick to address the issue or answer the question I had. It's for all of these reasons I continue to recommend the container.

Go with Prism Unity Container

Prerequisites
  • Visual Studio 2017 or later (Windows or Mac)
Setting up a Xamarin.Forms Project

Start by creating a new Xamarin.Forms project. You wíll learn more by going through the steps yourself.

Create a new or existing Xamarin forms(.Net standard) Project. With Android and iOS Platform.

Install "Prism.Unity.Forms" Nuget

Now, add the following NuGet Packages.
  • Prism.Unity.Forms
Go to Solution Explorer and select your solution. Right-click and select "Manage NuGet Packages for Solution". Search "Prism.Unity.Forms" and add Package. Remember to install it for each project (.NET Standard, Android, iO, and UWP).

Change Application to PrismApplication

After install Prism.Unity.Prism, Change Application to PrismApplication in App.Xaml

App.xaml

Register NavigationService

Change Application to PrismApplication and add IPlatformInitializer to App Constructor.
Then register your content page and ViewModel using IContainerRegistry
  1. override OnInitialized (Initialize Components)
  2. override  RegisterTypes (Navigation Service Register)
Refer following code snippet.

App.xaml.cs

Platform Setup

Android

Need to change IPlatformInitializer in LoadApplication.

MainActivity.cs

iOS

Need to change IPlatformInitializer in LoadApplication.

AppDelegate.cs

MVVM BindingContext

You no need to set BindingContext your ViewModel to ContentPage. Just create a ContentPage name ending with Page. (Ex: MyPage). Create a ViewModel name staring with ContentPage Name (ex: MyPageViewModel).

ViewModelLocator

If Viewmodel BindingContext is not working. Follow the below step.

ContentPage.xaml.cs

ContentPage.Xaml

Click the "Play" button to try it out.

Wow, it's working. 😍

I hope you have understood how to how to use Prism in existing Xamarin.Forms app.

Thanks for reading. Please share your comments and feedback. Happy Coding :)
Delpin Susai Raj Tuesday, 3 December 2019

Xamarin.Forms - Converter in MVVM using IValueConverter

In this blog post, you will learn how to use Converter in MVVM using IValueConverter in Xamarin.Forms.


Introduction

Xamarin.Forms - Working With Triggers
Xamarin.Forms code runs on multiple platforms - each of which has its own filesystem. This means that reading and writing files is most easily done using the native file APIs on each platform. Alternatively, embedded resources are a simpler solution to distribute data files with an app.

Value Converter

Use Converter instead of Trigger. Data bindings usually transfer data from a source property to a target property, and in some cases from the target property to the source property. This transfer is straightforward when the source and target properties are of the same type, or when one type can be converted to the other type through an implicit conversion. When that is not the case, a type of conversion must take place.

Prerequisites
  • Visual Studio 2017 or later (Windows or Mac)
Setting up a Xamarin.Forms Project

Start by creating a new Xamarin.Forms project. You wíll learn more by going through the steps yourself.

Create a new or existing Xamarin forms(.Net standard) Project. With Android and iOS Platform.
Create IntToBoolConverer 

Now, Create an IntToBoolConverer class Derived from IValueConveter

I implemented IntToBoolConverter If value !=0 I return true or else false. Whatever logic you need you can implement here.

IntToBoolConverter.cs

Setting up the User Interface

Here, Use IntToBoolConverter in your XAML.

Add Namespace

Add Static Resource

MainPage.Xaml 

Click the "Play" button to try it out.

ValueToColorConveter

In this converter, I used to change color by given values.  If value = 0 Red color else Green color.

ValueToColorConveter.cs


Whatever you need to write conditions in XAML use Converter. My suggestion use converter instead of Triggers.

I hope you have understood how to use Converter in MVVM using IValueConverter in Xamarin.Forms.

Thanks for reading. Please share your comments and feedback. Happy Coding :)
Delpin Susai Raj Thursday, 28 November 2019

Xamarin.Forms - EventToCommand Behavior in MVVM ViewModel

In this blog post, you will learn how to use Appearing and Disappearing in MVVM ViewModel using EventToCommand Behaviour in Xamarin.Forms.

Introduction

Xamarin.Forms code runs on multiple platforms - each of which has its own filesystem. This means that reading and writing files is most easily done using the native file APIs on each platform. Alternatively, embedded resources are a simpler solution to distribute data files with an app.

EventToCommand Behaviour

EventToCommandBehavior class is a reusable Xamarin.Forms custom behavior that executes a command in response to any event firing.

Following behavior properties must be set to use the EventToCommand behavior:
  1. EventName – the name of the event the behavior listens to(Ex: Apperaing).
  2. Command – the ICommand to be executed. The behavior expects to find the ICommand instance on the BindingContext of the attached control, which may be inherited from a parent element.
Prerequisites
  • Visual Studio 2017 or later (Windows or Mac)
Setting up a Xamarin.Forms Project

Start by creating a new Xamarin.Forms project. You wíll learn more by going through the steps yourself.

Create a new or existing Xamarin forms(.Net standard) Project. With Android and iOS Platform.
Create BehaviourBase Class 

Now, Create a Behaviour Base class Derived from Behavior and BindableObject

BehavourBase.cs

Create EventToCommand Behaviour

Here, Create a EventToCommand Behaviour Class to convert your events to Commad and also implement bindable properties.
  1. EventName
  2. Command
EventToCommandBehaviour.cs

BaseViewModel

In this step, I Create a common BaseViewModel for reusable purpose.

Note: I use RelayCommand Instead of Command. you can use Command.

Refresh

Refresh command indicate to Appearing Commad. Whatever you want to implement when page load time you can use RefrehCommad.

CleanUp

Cleanup command indicate to OnDisapearing. This CleanUpCommand when your page is dis appearing time it will be called.

BaseViewModel.cs

MainPageViewModel

Now, Use Refresh and CleanUp command from BaseViewMmodel in your Pages.

MainPageViewModel.cs

Setting up the User Interface

Here, Implement EventToCommandBehaviour in your View.

Add Namespace

Add Behaviour

MainPage.Xaml 

Click the "Play" button to try it out.

I hope you have understood how to use Appearing and Disappearing in MVVM ViewModel using EventToCommand Behaviour in Xamarin.Forms..

Thanks for reading. Please share your comments and feedback. Happy Coding :)
Delpin Susai Raj Friday, 18 October 2019

Xamarin.Forms - MVVM ViewModel Locator using MVVM Light

In this blog post, you will learn how to create a MVVM ViewModel Locator using MVVM Light in Xamarin.Forms.

Introduction

Xamarin.Forms code runs on multiple platforms - each of which has its own filesystem. This means that reading and writing files is most easily done using the native file APIs on each platform. Alternatively, embedded resources are a simpler solution to distribute data files with an app.

MVVM

MVVM - Model View ViewModel

MVVM Is the design pattern to separate the user interface & business logic concerns.I suppose that you heard something about it. This pattern created by Microsoft is widely used with applications created with .NET Framework but not only because you can also use it with Xamarin.

There are many different frameworks to help Xamarin developer
  • MVVM Cross 
  • MVVM Fresh 
  • Prism
  • MVVM Light
MVVM Light

MVVM Light lightweight framework which allows developers to choose which components they want to use. (like ViewModel Locator, Navigation Service, Dialogue Service)

Prerequisites
  • Visual Studio 2017 or later (Windows or Mac)
  • Mvvm Light Nuget Package
Setting up a Xamarin.Forms Project

Start by creating a new Xamarin.Forms project. You wíll learn more by going through the steps yourself.

Visual Studio 2019 has more options in the opening window. Clone or check out the code from any repository or, open a project or solution for your computer.

Now, you need to click "Create a new project".
Now, filter by Project Type: Mobile

Choose the Mobile App (Xamarin. forms) project under C# and Mobile.

Name your app. You probably want your project and solution to use the same name as your app. Put it on your preferred location for projects and click "Create".

Now, select the blank app and target platforms - Android, iOS and Windows (UWP).

Subsequently, go to the solution. In there, you get all the files and sources of your project (.NET Standard). Now, select the XAML page and double-click to open the MainPage.Xaml page.

You now have a basic Xamarin.Forms app. Click the Play button to try it out.

NuGet Packages

Now, add the following NuGet Packages.
  • MVVM Light
  • MVVM Light Libs 
Go to Solution Explorer and select your solution. Right-click and select "Manage NuGet Packages for Solution". Search "MVVM Light" and add Package. Remember to install it for each project (.NET Standard, Android, iO).

ViewModel Locator

Here, Going to register Viewmodels and Create instance using Mvvm Light.

ViewModelLocator.cs

App.xaml.cs

In this step, Create a Viewmodellocator instance when your app first time open.

BindingContext

Now, Set your ViewModel BindingContext to ContentPage.

Done.

I hope you have understood how to create a MVVM ViewModel Locator using MVVM Light in Xamarin.Forms..

Thanks for reading. Please share your comments and feedback. Happy Coding :)