In this blog post, you will learn how to Detect and correct spelling mistakes in your app using Cognitive Service Bing Spell Check API in Xamarin forms.
Introduction
Xamarin.Forms code runs on multiple platforms - each of which has its own filesystem. This means that reading and writing files is most easily done using the native file APIs on each platform. Alternatively, embedded resources are a simpler solution to distribute data files with an app.
Cognitive Services

Xamarin and Cognitive Services together can infuse your apps, websites, and bots with intelligent algorithms to see, hear, speak, understand and interpret your user needs through natural methods of communication. Also, they help you transform your business with AI today.
Use AI to solve business problems
- Vision
- Speech
- Knowledge
- Search
- Language
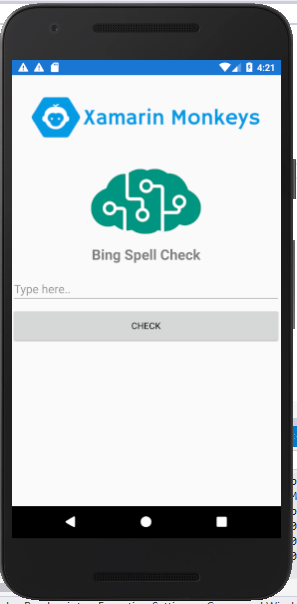
Bing Spell Check API
- Bing Spell Check API help users correct spelling errors, recognise the difference among names, brand names and slang, as well as understand homophones as they are typing.
- Bing Spell Check API has developed a web-based spell-checker.
- Bing Spell Check API returns a list of words it does recognize with suggested replacements.

Prerequisites
- Visual Studio 2017 or Later(Windows or Mac)
- Bing Spell Check API Key
Setting up a Xamarin.Forms Project
Start by creating a new Xamarin.Forms project. You’ll learn more by going through the steps yourself.
Visual Studio 2019 has more options in the opening window. Clone or check out the code from any repository or, open a project or solution for your computer.
Now, you need to click "Create a new project".

Now, filter by Project Type: Mobile
Choose the Mobile App (Xamarin. forms) project under C# and Mobile.
Name your app. You probably want your project and solution to use the same name as your app. Put it on your preferred location for projects and click "Create".
Now, select the blank app and target platforms - Android, iOS and Windows (UWP).
Subsequently, go to the solution. In there, you get all the files and sources of your project (.NET Standard). Now, select XAML page and double-click to open the MainPage.Xaml page.
You now have a basic Xamarin.Forms app. Click the Play button to try it out.
Get Bing Spell Check API Key
In this step, get Bing Spell Check API Key. Go to the following link.
https://azure.microsoft.com/en-in/services/cognitive-services/
Click "Try Cognitive Services for free".

Now, you can choose Bing Spell Check API under Language APIs. Afterward, click "Get API Key".

Now, the API key is activated. You can use it now.
Note
The trial key is available only for 7 days.

Setting up the User Interface
Go to MainPage.Xaml and write the following code.
MainPage.xaml
Click the play button to try it out.
NuGet Packages
Now, add the following NuGet Packages.
- Newtonsoft.Json
Go to Solution Explorer and select your solution. Right-click and select "Manage NuGet Packages for Solution". Search "Newtonsoft.Json" and add Package. Remember to install it(.NET Standard).
Create a Model
In this step, you can create a model for Deserializing your response.
ResponseModel.cs
Bing Spell Check.
In this step, write the following code for Bing Spell Check.
Note:
Try out the spell check capabilities with Bing Spell Search API v7.
- ‘Spell’ is more aggressive in order to return better search results,
- ‘Proof’ is less aggressive and adds capitalisation, basic punctuation and other features to aid document creation.
Click the Play button to try it out.
I hope you have understood how to Detect and correct spelling mistakes in your app using Cognitive Service Bing Spell Check API in Xamarin.Forms.
More Sample from Github
Thanks for reading. Please share comments and feedback. Happy Coding :)